I thought I would share some information on what my anvil setup is, and how to setup an anvil.  Firstly you could use almost any steel with a flat surface as anvil.  However the mass and hardness of the anvil will affect the ease and quality of the work done on the anvil.

There are many styles of anvils as well as different price points.  There are inexpensive anvils out there but you want to avoid cast anvils which will be less expensive than forged anvils.  The rationale is pretty simple cast is not nearly as strong as forged steel.  You could use a cast anvil from Harbor Freight or  Grizzly successfully for a while, but eventually it is going to crack.  If you look a the cost of new anvils it is clear why most folks go with a used anvil and live with any issues or limitations.

There are many anvils available used at online sites or actions.  There is nothing wrong with a used anvil as long as you are aware of what you are buying or what the limitations are.  A high quality anvil will be forged from tool steel.  One simple method of testing an anvil is to loosely hold a hammer in your hand and let it fall from about 12″ (your hand should just be guiding it).  The anvil should ring and the hammer should bounce off the anvil to approximately 50% of the drop height and a sharp note should be heard.  If the hammer does not bounce well or the ring sounds dull, I would avoid that anvil. The face of the anvil should be flat and be devoid of cracks, fissures, etc.  

Depending on the anvil there could be two different holes in the face.  The square hole is called the hardy hole and is typically 1″x1″.  This is used to mount tools for hot work such as cuttoff tools, fuller dies, etc.  The second round hole varies in size depending on the anvil and is called the pritchet hole.  The pritchet hole can be used when hot punching or to hold tools or special clamps.

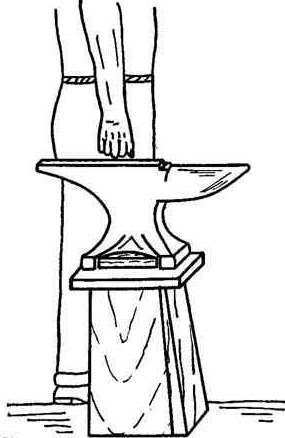
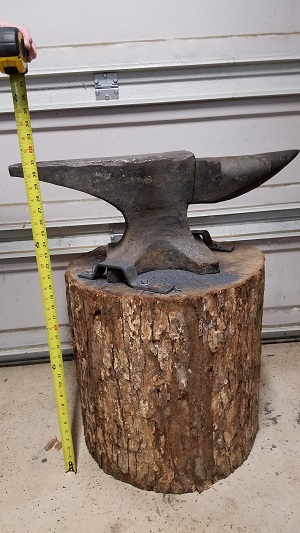
Once you have an anvil there are two critical choices that have to be made.  How to attach the anvil to a stand and what the height of the anvil face will be.  In general the anvil face should be such that if you hold a hammer on the face of the hammer your elbow should be at 90 degrees.  This height minus the height of the anvil will determine the height of the required mount.
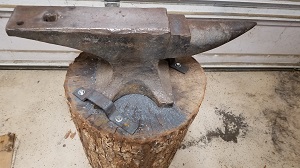
picture of anvil
Anvil
Picture of proper anvil height
Proper Anvil Height
picture of anvil with tape
Anvil with tape measure

The mount for the anvil could be anything from a metal stand to a round of wood.  My anvil is mounted on a round of white oak.  Any reasonably strong dense would should work.  I would avoid pine or any other woods that are not very dense.  As you can see in the pictures above the face of my anvil is pretty rough around the edge and the step.  I should get the face milled, but even though the edges are not square it hasn’t caused me many issues.   I bought this anvil along with a 4′ x 4′ steel welding table for $300 at auction.  You will find that anvil prices vary greatly and that they get snapped up pretty quickly not only by folks wanting to do smithing, but fashion designers and antique sellers.
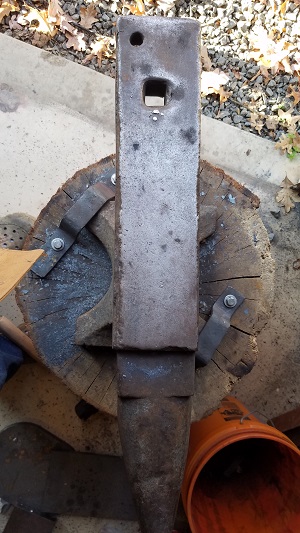
picture of anvil anchors

The next major consideration is how to mount the anvil to the stand.  There are lots of attachment options, one that simple and favored by some folks is chains.  I tried chains for about 5 months and no matter how tight I tried to make the chains the anvil moved around too much.

In the end I forged some simple brackets out of 1″ x 1/8″ bar stock that go over two of the feet.  I attached it the oak round using 4″ lag bolts.  The anvil does not move an iota now and is rock solid.  It was definitely worth the minimal effort required to make the mounts.
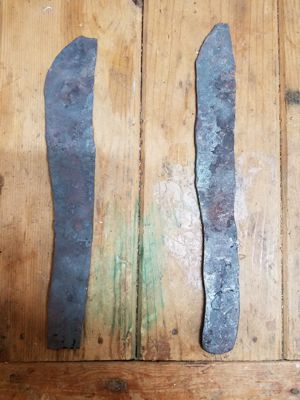
 

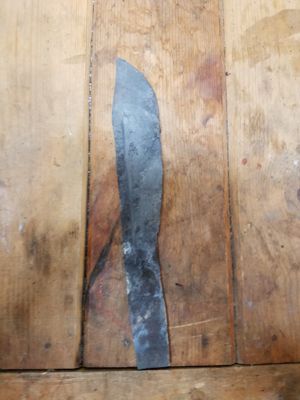
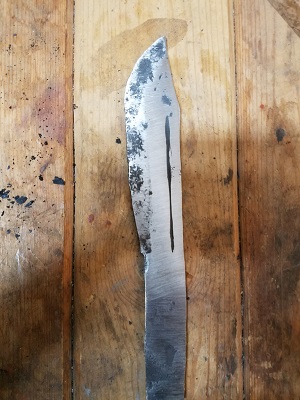
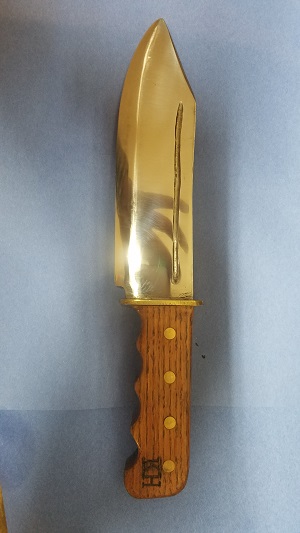
Earlier this year I made a Bowie knife where I was attempting to make it slightly larger than one had made previously and I wanted to try and get a mirror finish on the blade.  It was made from 5160 spring steel flat stock that was 1/4″ x 1 1/5″.  All the forging was done by hand using the charcoal forge.  It took quite a while to get the shape hammered out.

Picture of Rough forging of Bowie Blade (left)
Rough forging of Bowie Blade (left)
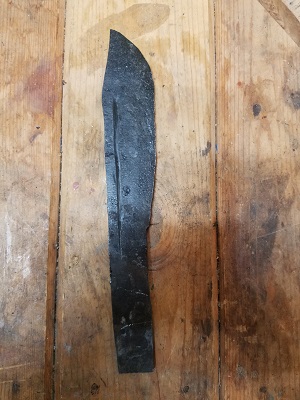
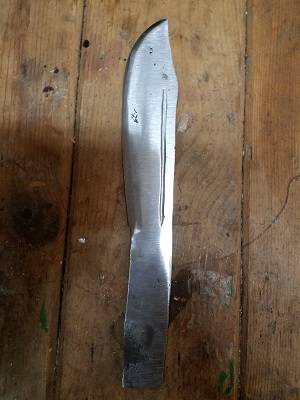
Picture of Buoy Knife with fuller ground in
Buoy Knife with fuller ground in


Bowie knife after quenching


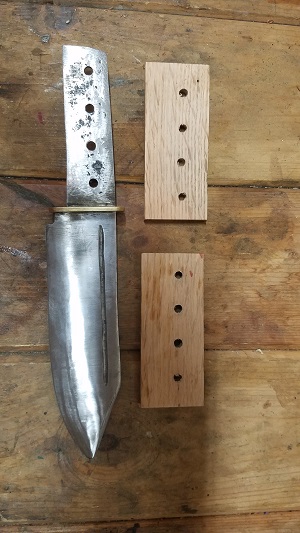
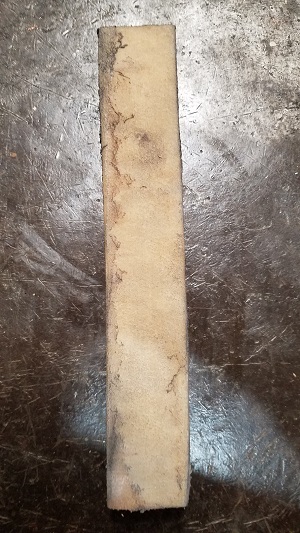
This knife was “ground” using the Harbor Freight 4″x36″ sander and it took a fair bit of effort to get it ground down even using 24 grit belts.  After the heat treat I did more finish grinding and then installed a brass guard that was cut out of 2″x1/8″ brass stock.  The scales were made of wormwood white oak that was dead fall on the homestead.  In addition to milling dead fall into fence boards, I also make project boards that vary but are generally ~3/4″ x 6″ that I use for various projects.

Bowie knife after initial rough grinding
Bowie knife after additional grinding


Bowie knife with guard before installing scales


I have come to the conclusion that I do not like 5 minute epoxy.  It sets up so quickly that if there is a little bit of an issue with a pin, or aligning clamps, all of the epoxy has to be removed.   Since this project completed I am now using 15 minute epoxy and it works better overall for me.  In addition I have found a 15 minute epoxy that has significantly less fumes/chemical smell. Its from Bob Smith Industries and is available on Amazon for around $12.

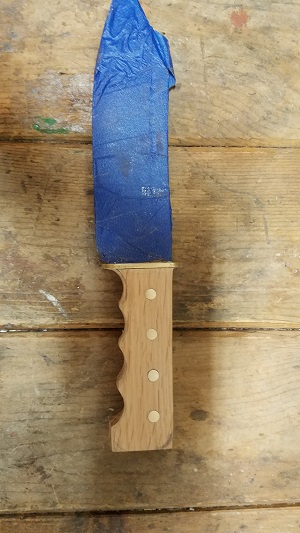
Bowie knife with handle mostly shaped
Bowie knife after polishing


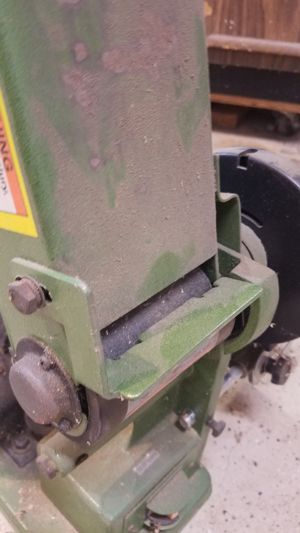
Picture of Belt Cleaner
Sanding Belt Cleaner


I am using 3/4″ and 1″ barrel sanding drums on a drill to grind the finger wells.  It seems to work pretty well with the exception of the paper constantly clogging.  Every few minutes I have to unclog the drum with a sanding eraser.  They are also called sanding belt cleaners and are available from Harbor Freight or Amazon for under ten bucks for the 8″ long ones.  Using a belt cleaner will definitely extend the life of your belts and drums but you cannot wait until they are totally clogged before cleaning them.

In order to get the mirror finish you have to grind to at least 800 grit.  After that I used 1″ felt drums on a Dremel with polish compound.  Care must be taken when using the Dremel because if any part of the tool rubs against the blade it will make a small scratch.

I originally put a poly coat over the blade except on the cutting edge to reduce corrosion.  It worked fairly well but there were some small oxidization spots that appeared after a few months under the finish.  I removed the poly and touched up the grinding and refinished it.  Removing the poly was a pain and can cause fine grit belts to clog.  I was able to remove some of the finish with paint thinner, but I need to figure out a better method in the future.

Update 11/16/2019 – This blade is up for sale on my Etsy shop here.

The first few knives I made were from railroad spikes that had been recovered during metal detecting.  Obviously steel retrieved after being buried in the ground for years will have deteriorated.  I selected a few that were the best looking and did not appear to have been buried for 100 years.

I think I threw these in the forge without any cleanup which is a mistake.  Take the extra time and use an angle grinder to remove all of the rust and get down to clean metal.  This will eliminate a lot of issues and heartache later.

 I don’t have many in-progress pictures for these, but I forged them out and folded the spike head in to the billet without forge welding it.  I believe I ended up having to weld where the spike head ended up in the billet because of inclusions.

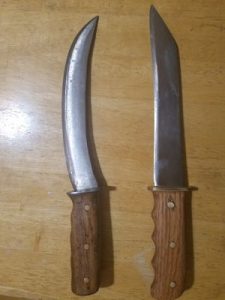
The first knife was a skinner.  This is mainly because that is how it forged out. As I drew out the edge it became larger which caused it to curve.  I just went with the flow and made the knife that way.  The handles I used are sourced from trees I mill on the homestead.  Typically they are white oak. The second knife I made was a Sax.  I think it is amazing that you can draw out a full tang knife around 11″ long using just one railroad spike.  

I am using a 4″ x 36″ stationary sander from Harbor Freight to grind with.  I started by using the 40 and 80 grit belts available from Harbor Freight.  They will remove stock but it takes a long time.

After using the charcoal forge I built for a few years I decided it was time to upgrade.  I was spending a lot of time heating metal up to temperature and I would end the the session with soot in my hair and pretty much everywhere.  One downside of the charcoal forge I built (you can read about it here) is that during the forging session ashes and clinkers would collect and the efficiency of the forge would be reduced.

I spent a fair amount of time researching forges and it turns out that if your are in for a dime you might as well go in for a dollar. meaning that going to more burners than two or three didn’t really affect the cost much more.

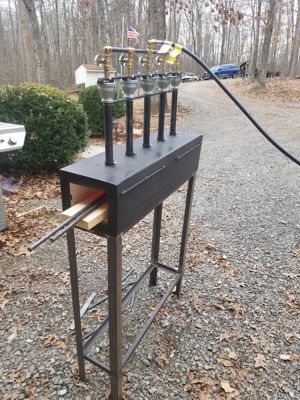
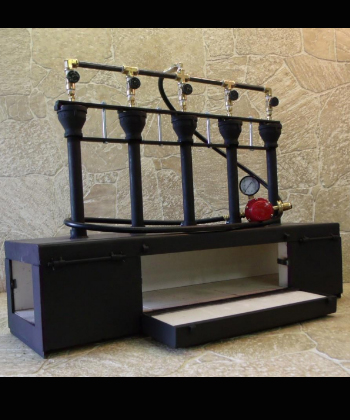
 In the end I decided to go with Majestic Forge, the prices seemed pretty reasonable and they had setups with more burners.  If you watch “Forged in Fire” you have seen the Majestic 3 burner KnifeMaker setup.  I decided to go with the artist deluxe 5 burner that allows you to heat odd shaped items.  The reason I went for more burners was to allow the option to do longer pieces of work such as swords in the future.

Picture of 5 Burner Propane Forge
5 Burner Propane Forge
picture of 5 burner artist delux
5 Burner artist deluxe
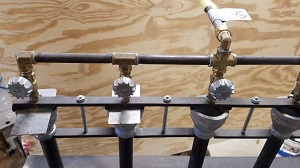
picture of propane forge values
Propane Forge Valves and Cover

I made a stand out of 1 1/2″ angle iron to hold the forge.  It seems plenty sturdy and although in the pictures it looks top heavy it isn’t.  In the future I intend to add some additional angle iron on the side to hold tongs and hammers.  I haven’t exactly figured out how far away I will need to place the handles so they don’t get hot from the forge.

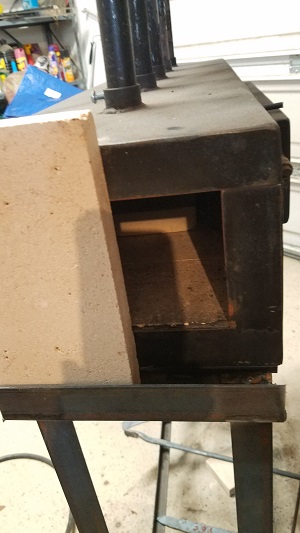
The manufacturer suggested adding covers for burners that are not being currently used, so I made some rectangular pieces out of steel flashing that slide in and out as needed.  The manufacturer explicitly said do not block the entrances to the forge.  I am guessing that is due to liability issues and the potential for turning the forge into a bomb if propane builds up inside with out a fire.  I ran it without blocking the backside for a good while but I eventually fabricated a small ledge to put firebricks on.  The main reason I did this was not to make the forge heat up faster but to prevent excess heat coming out of the rear of the forge due to the limited amount of space available in my shop. 

picture of firebrick on end
firebrick on end

I am using 100 lb propane tank along with a propane extension hose so I could put the bottle 25′ away from the forge.  To operate the forge, you light it and set it to low and let it run for 5-10 minutes to preheat the forge and allow any moisture to evaporate.  The forge is then turned off for 5 minutes and relight.  It costs about $75 to refill the 100lb propane tank which lasts me several months as I use the forge fairly often but not daily for long periods of time.

 Overall I have been very happy with the forge and it is definitely a nice convenience to light it up and not have to worry about bringing charcoal up to heat and having soot everywhere.  In addition it can be run indoors which obviously cannot be done with coal or charcoal without a flume.  While less traditional the propane forge is more well suited to hobbyists where time is a premium.


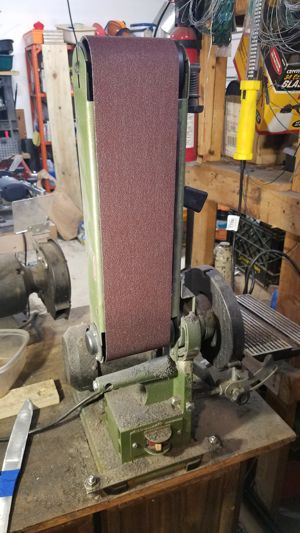
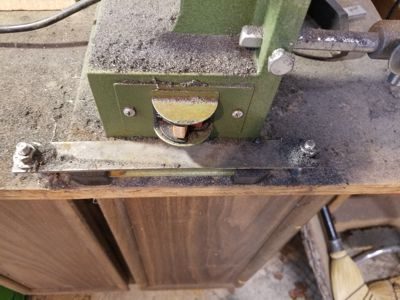
I am using a 4″ x 36″ stationary sander from Harbor Freight to grind with.  I did some minor modifications to it to make it easier to use.  These can be found on sale fairly regularly for about $60. I removed the belt guards and the tool rest because to change a belt they have to be removed.  As you work on grinding out a knife you will need to switch belts for the appropriate grit and as they wear out.  I also added a bar to hold the grinder in place on the workbench so it doesn’t slide around when grinding.

Picture of Sander with guard and work rest installed
Sander with guard and work rest installed
Picture of Modified Sander
Modified Sander


Picture of sander mounting bar
Sander mounting bar


I started by using the 80 and 120 grit belts available from Harbor Freight.  Somewhere I picked up some 40 grit belts as well.  They will remove stock but it takes a long time.  I still use Harbor Freight 80 grit belts for initial shaping of the handle or any other task where I don’t want to damage or put extra wear on my “good” belts.  I found some Zirconia belts from Red Label Adhesives that last longer and are available in coarser grits but of course cost more.  I use the 24 grit belt for  rough metal stock removal. As the grinding process continues work my way through the other grits (typically 40 and 80) as the blade gets closer to being ready for hardening.

It takes more time than desirable using this setup.  It cannot remove material anywhere near as fast as most 2″ x 72″ grinders.   The lack of different sized pulley wheels makes hollow grinding almost impossible.  The only spot to attempt a hollow grind is using one of the ends of the grinder but free-handing without a work piece rest requires a very steady hand.

Deciding how much material to leave prior to hardening can be difficult (at least for me).  All of the hammer marks should be ground out at this stage.  You want to remove as much stock as possible to reduce the grinding time after tempering, however you need to leave enough meat on the knife to prevent warping during the quench.  This is less of an issue if you are edge quenching versus quenching the entire blade.

After the blade is hardened and then tempered I will go back to the grinder and grind with 80, 120,  220, and 400 grit belts. 

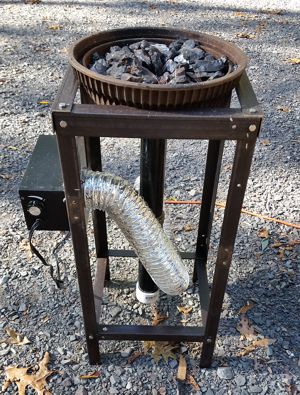
I have been working on blacksmithing and knifemaking for a couple of years.  I started with a minimal investment and made the forge myself.  A friend of mine had made a little forge using the rear break drum from a truck and had attached a piece of steel pipe that eventually transitioned to a PVC pipe.  He was using charcoal for fuel and a hairdryer for air.  His forge was held up by cinder blocks and he was using a railroad track joiner as an anvil.  To keep the charcoal from falling down the pipe he used a couple of layers of stainless steel 1/2″ mesh. 

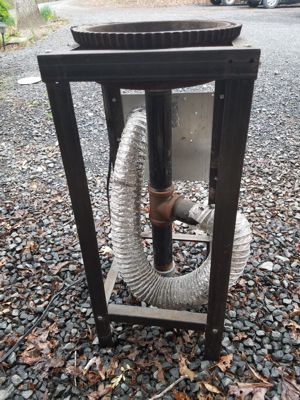
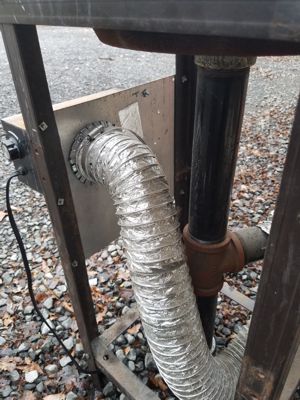
I took his idea and made some improvements.  I welded on an adapter flange that allows 2″ black pipe to be screwed in. A T about a foot down from the break drum allows air to come in and the ashes to fall to the bottom.  A screw cap at the bottom holds the ashes up and allows the air to only flow upward into the forge.  Using an old bed frame I made a stand that holds the forge and the squirrel cage fan.  I used metal flexible hose to bring the air from the fan into the T.  I bought a fan with variable speed control built in on Amazon.  The break drum can be bought from automobile shops or junkyards for a few dollars. 

 In general this setup works pretty well, however the fan output doesn’t vary enough between the lowest and highest setting.  I also wish the fan produced more airflow when turned up all the way.

Picture of Homemade Charcoal/Coal Forge
Homemade Charcoal/Coal Forge
Picture of Charcoal Forge Side View
Charcoal Forge Side View
Picture of Charcoal Forge Close Up
Charcoal Forge Close Up

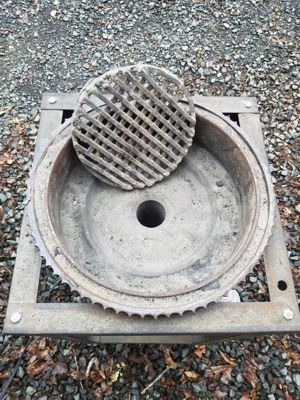
After using the forge for a while one issue was the stainless steel mesh holding up the charcoal clogs after a while and restricts airflow.  To remedy this I took some 1/4″ square stock and built a circular “mesh” with about half inch gaps between the steel.  This works much better and cleans out pretty easy since you can just take out the grill and bang it on something to clean out the debris and clinkers.

Picture of Charcoal Forge Top View
Charcoal Forge Top View

This setup definitely works, but it takes a while to get the charcoals up to temperature and heating the stock takes a while.  Better airflow from the fan would help with both of those issues.  A charcoal forge can reach temperatures of 1600 degrees Fahrenheit which is hot enough to do any forging except forge welds. A few other down sides is you will definitely smell like smoke and you have to dispose of the ashes fairly regularly.  I found I could forge for about 2 hours but after that there were air flow restrictions from the ash and clinkers that greatly reduced the efficiency.

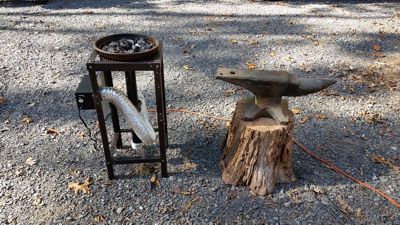
Picture of Charcoal Forge and Anvil
Charcoal Forge and Anvil